Go outside , look around you, and notice the trees. Trees form the backdrop of our environment. Just what are trees and what do they do? It is interesting to study trees because they are so different from the rest of creation. From the majestic redwood to the resilient bristle cone pine, trees add utility and beauty to our lives.
Make trees a year long study and make a notebook or lapbook that shows what you learned!
A tree is..
A woody, perennial plant with one main stem or trunk which develops many branches. Most trees are over ten feet tall. – Webster’s Unabridged Dictionary
When you walk through the forest take your camera, a plant press, a marker pen, a small bag for samples of bark, a tape measure, your notebook, a tree identification guide, and lunch. Put everything in a backpack for comfort. If you are in a park and cannot walk far, you can carry everything in a picnic basket and still do your tree study. Wear sturdy shoes and comfortable clothing.
Before you leave home, look up the definition of a tree and record it in your notebook. As you walk, you may need to recognize the difference between trees and large shrubs so look up shrub, too.
As you walk up to the forest…
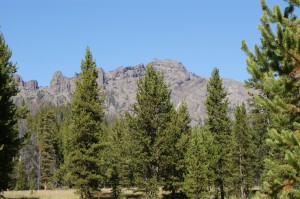
Take a photo of it as a whole. This will show you later what the habitat was and the general layout of the forest. A photo will be a record of the environment so that you can compare this season’s forest with that of later seasons. Is there undergrowth or is it grassy? Are there low shrubs around for small animal homes? Are the trees in leaf? Is there snow or water on the ground? If you use a photograph, you can record most of the data at home after your walk.
Use this Tree Page download to record your data.
In the forest…
Choose a tree. An adult tree is best. Record its circumference, the types of bark, leaf shape, and branch pattern. Does it have any fruit or nuts? Stand back and observe its shape. Record your data in your notebook.
Measure the height of the tree.
You can do this in the same way that you measure the height of a building or the height of a model rocket in flight.
- Measure with the tape measure ten of your paces and figure out how far 100 feet actually is in your own paces. You will walk that number of paces out from the tree.
- Start at the bottom of the tree and walk outward in a straight line counting your paces for about 100 feet. Mark the spot.
- Use a protractor to measure the angle from the ground to the top of the tree. A clinometer is helpful, but not required. It provides a way to sight the tree along the straight edge of the protractor and easily read the angle with a weighted string. Here is a video on how to make a simple one.
- Use the chart on the Tree Page download to convert the measured angle into the height of the tree. Record.
An alternative, easier method:
- Fold a square piece of paper into a triangle, making one 90° angle and two 45° angles.
- Walk outward from the tree in a straight line until the top of the tree can be sighted along the 45° fold. At this point the number of feet you walked is equal to the height of the tree in feet.
- Count your paces and divide by the number of feet per pace in order to determine the feet you have paced outward from the tree. This is also the height of the tree.
If you are allowed, take samples of the leaves of each of the trees you studied. If you cannot remove samples from your location, draw or take pictures of the leaves for your notebook. Be sure to record each leaf’s source tree. You can also take samples of very small pieces of bark choosing fallen pieces of bark about 2 inches square. Use a marker to record the type of tree bark on the back of the sample.
Girdling a tree is removing the bark in a circle all around the tree. This will kill the tree. Taking any bark from a living tree is dangerous to the tree. Please take bark samples only from dead trees.
Tree Rings
When a tree grows, the plant constructs a sturdy kind of tissue called wood. Wood and leaves make up the living part of the tree. As the tree grows, it makes more wood and the tree gets thicker.
 Wood is designed by God to be strong, resilient, and lasting. That is why we can make our houses out of wood. The tree must be able to withstand wind, cold, heat, and even floods. Noah built his ark out of wood because God told him to do so. God knew that a boat made of wood would float even in the terrible flood which was coming.
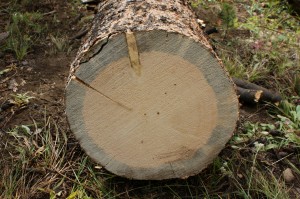
When trees grow, wood is added to the trunk in rings. Dark rings are made when the winter slows down the tree’s growth. Lighter, thicker rings are made in the summer when there is plenty of water, light, and warmth for growing.
Lunch break…
Choose a rock on which to sit for your lunch. As you eat, enjoy the beauty and majesty of the trees around you. Not all places have trees. There is a forest in west Texas which boasts one tree with no others for miles. Notice the shape of the branch pattern. There is a specific pattern for each kind of tree. Some branch styles have been used by architects as patterns for churches. In a winter forest in Arkansas the branches form a beautiful cathredral designed by the hand of God.
As you sit, sketch the branch patterns of several trees. This is easier in winter, but not impossible in other seasons.
When you return home…
- Look up the type of trees you studied. Do they have uses to people? Some possible uses are: fruit, nuts, wood for paper and lumber, landscaping. climbing, swinging from, homes for animals like squirrels, holding up basketball hoops and bird houses, and so on.
- Organize your notebook according to tree types, for example: oaks, maples, pines, etc.
- Label a page according to tree type and write the information you gathered about that tree on the page.
- Preserve your leaf samples by gluing each onto a sheet of paper. Label by name of tree, location of collection, and date of collection.
- Attach any photos you have on the pages containing information on that tree.
- Place the overall environment photos in the front of your notebook. If you have seasonal photos, include them in order. Don’t forget to label your photos.
- Decorate the notebook according to the tree theme.
Do you have any wonderful resources for a tree study? Leave a comment and let us know!


Great post! We did a similar height experiment using a pencil. i was amazed how accurate it was. I’ve been working on one of my own that will show how to identify trees using leaves & bark.