Posted on

Fossils: Stones and Bones, part 2

Here are some activities for you to try at home as you study fossils!

1. Make a cast of a footprint.
Find a really nice paw print of a dog, of a cat, or of some other animal. Clear away the leaves and debris from the outer edges of the print. Take a 1-inch wide strip of card stock (an index card works well) about 11-inches long (longer if necessary) and staple it into a circle. Place the card circle so that it surrounds the print like a fence. Dig it into the dirt a little so that it is secure.  Pour plaster which is the consistency of toothpaste into the print and the fence.  Let set and remove.  You should have a cast of the print.  If you do not have a good footprint, make one using your dog, a little dirt, and some water.  Make mud and press your dog’s paw into it.  Allow the print to dry until it is hard enough to keep it’s shape when touched.  Then make the cast as before.

2. Making a plaster copy of a footprint.
After your cast of the animal footprint has become firm, put a thin layer of petroleum jelly all around the inside of the cast.  Put another card stock sleeve around the casting to make a cuplike form.  Pour plaster of paris at a toothpaste consistency into the cup.  Allow to set.  Remove the card stock and separate the layers.  You should now have a plaster copy of the foot print.  You can do this with your little sister’s hand print, too.

3. Dissolving the bone / the first step of replacement.
When a future fossil is replaced by minerals it is done very slowly, a particle at a time so that the structure of the original organism is still preserved by the replacing minerals.  Sometimes even the cells of the plant are able to be seen even though the original cells are long gone.  This is how the trees were petrified in the Petrified Forest.  The water first dissolves the material of the organism, then replaces it with another particle, a mineral.  Some fossils are replaced with beautiful agates and are turned into wonderful specimen you can use as decorations at home.

You can not try replacement, but you can experiment with the first part of the process, the removal of the material of a bone.  Place a chicken bone in a glass of vinegar or of carbonated water.  Each of these liquids are acidic and will dissolve the calcium out of the bone leaving the cartilaginous material which bends easily.  When a tooth is placed in carbonated water, it will dissolve completely.  Ground water filtering through a future fossil may be acidic.  This acid will dissolve the calcium in the organism leaving a spot which may be filled by a mineral also in the water.  A useful tip:  You can increase the calcium content of a stew by adding the bones of the meat along with a tablespoon of vinegar.  You will not taste the difference but the stew will have a considerable amount of calcium in it taken from the bone by the acid.

4. Fossil hunt
You can make up some artificial fossils by putting objects to be excavated into a matrix which is then carved away to reveal the “fossils”.   What you choose to place into the matrix should depend upon the age of the child and whether it is to be eaten during the experiment.

There are several different things you can use as the matrix.  Some people prefer using plaster of Paris because of its rock-like texture, but it is hard and can be difficult to carve.  If you use this matrix be sure to use eye protection.  Parafin can be used and then carved easily with nails and popsicle sticks.  You can simulate different rock layers by using crayons to color the melted wax.  Remember to be careful with the melted wax.  You can even use cake dough and cook some whole pecans into the dough.  Excavating can be done with forks and spoons.  Jello is another matrix you can use for the “fossil” excavation.  If using an edible matrix, be sure to use edible “fossils”.

The best type of fossil hunt you can do, though, is outside hunting real fossils.  If you live in a city, look for building made of limestone, marble, or some other once sedimentary material.  Many building materials have fossils in them.  Marble, though, once sedimentary has been metamorphosed and changed by pressure or temperature.  The fossils within will have been changed, too, but in many cases are still recognizable.  Many libraries have shells embedded in their steps and we walk over them without ever noticing them.

5. Collecting data.
Use a 3×5 Data Card to record notes while collecting fossils.  You may forget where you collected the specimen and you may want to remember a particular location. On a 3×5 card, jot down the following notes:

Name of the fossil (type of creature or plant, if you know it):
Date:
Rocks the fossil came from:
Drawing of the position of the fossil in the rock:
Location of collection site: Get out and collect some fossils and try some of these activities!  Stay tuned for part 3 of this post: Internet and Print Resources for the study of fossils.

Posted on 2 Comments

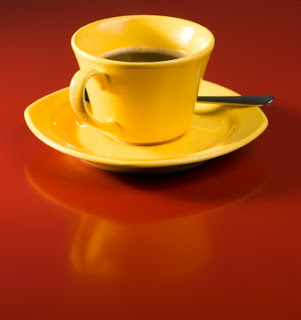
Everyday Science: The Coffee Problem

Science is around us all the time.  But we knew that, right?  As you drink your morning coffee, consider this problem posed to my college calculus class years ago:

You have just poured yourself a hot cup of coffee and are about to add cream, cold from the refrigerator, when the telephone rings.  Should you pour the cream before or after you answer the phone?  

Simple, right?  Our class was tasked to write a differential equation to describe the problem.  My time-weakened and diaper-dulled brain couldn’t even begin to tackle the problem now, but it could prove an interesting discussion for your middle school through high school homeschoolers.  Call it an opening bell attention gainer.  It might need to be accompanied with an explanation of why you would answer the phone at all when the person calling could just as well text or e-mail and then the entire problem would be solved.  But pretend for arguments’ sake you did have to get the phone.

Some questions that might come up:  What is the temperature at which you prefer to drink the coffee?  How hot is the coffee and how cold is the cream?  How long will the phone conversation last?  Once the cream is poured, how long will the coffee take to reach a drinkable temperature?  What other factors might be present that would affect the cooling rate of the coffee?  Ambient temperature of the room?  Mass of the cup?  Composition of the cup?  On what surface is the cup sitting?  Which factors will be most important in considering how fast the coffee will cool?  Which factors will be least important?  What if the cream started at room temperature?  Would it help slow cooling to put the coffee cup in a smaller space?  Is there a ceiling fan on?  Are any of these questions red herrings?

Heat transfer is taking place between the coffee and the air, between the cream and the coffee, between the coffee-cream mixture and the cup, and between the cup and the counter.  These transfers of heat are happening at different rates based on initial temperature of each, the mass or volume of each, and the temperature differential.  These transfers of heat follow the Second Law of Thermodynamics in an attempt to reach thermal equilibrium.  The Second Law of Thermodynamics states that entropy always increases.  Entropy is a measure of the disorder of the thermodynamic system.  Disorder increasing, energy dispersing, becoming distributed amongst other elements of the system.  A hammer falls when you release it from shoulder height.  A ball rolls downhill when you release it at the top of the hill.  Coffee cools to room temperature.  Heat transfers from hot to cold, always, and never the other way around unless work is injected into the equation, such as the forced heat transfer that happens in your refrigerator coils.  Entropy always increases. (Lets save closed and open system discussions for that high school physics class)

Heat always moves from hot to cold.  The hotter the hot body and the cooler the cool body, the faster the transfer will occur.  If your coffee sat on the counter at room temperature, would any heat transfer be occurring?  No, because thermal equilibrium has already been attained.  This should shed some light on the question of when to add the cream.  When you add the cream, you are reducing the initial temperature of the coffee and bringing it closer to room temperature right out of the gate.  Know the answer yet?

The three basic forms of heat transfer are convection, conduction, and radiationConvection is transfer by means of fluid flow, remembering that a fluid can mean a liquid or a gas.  Conduction is transfer between atoms in contact with each other, remembering that this can be the top layer of molecules of coffee and the bottom layer of air molecules, or the first layer of the cup, and so out and so up and so forth..  Radiation is heat transfer by means of electromagnetic waves, in this case, the charged particles of the hot coffee producing thermal radiation.  For this problem, the question can be asked how each of these processes are occurring, and how fast they are occurring, but these are incidental to answering the initial question of whether or not to add the cream before answering the phone.

Once you are done with your coffee, and your roundtable discussion of how fast it has cooled, you can answer the question of when to add the cream, and then watch this old video from the California Institute of Sciences, which Dr. Ross must have seen back in the day before he taught that differential equations class.  Did you answer the problem correctly?

Posted on 1 Comment

The Scientific Method

Are you doing science activities or science experiments?  Do you know it isn’t that difficult to turn an activity into an experiment?  An activity leaves out the critical thinking process that is so well formulated in the scientific method.  Use these age-adjusted steps in the scientific method to help you with your science studies by transforming your activities into experiments!

For Your Youngest Child
These questions should be asked orally.  Introduce as much vocabulary and terminology as your child has the attention span for.

What do you think will happen?
What happened?
Draw a picture of what happened and label it (with help)

For Elementary Students
These questions should be asked orally with the answers to the questions dictated by the student and recorded by the parent onto the experiment writeup or observation sheet.  If your student can write, then he should do the writing himself.  Introduce as much vocabulary and terminology as your child has the attention span for.
 
What do we want to find out?
What do you think (or guess, or hypothesize) will happen?
What do we need in order to find out the answer?
How will we test our guess (or hypothesis)?
What happened? (Use a simple chart or graph as appropriate to record results)
Draw a picture of what happened and label it.
What do you conclude from this experiment?

For High School Students
The college preparatory high school student should be using all the steps in the scientific method and producing a typed or handwritten report for his or her science notebook.  The italicized steps below require more effort and are typically reserved for a science fair project or professionally published report.
 
Statement of the Problem
Research of the Literature on the Topic
Hypothesis
Materials List
Procedure Used
Observations
Calculations
Results
Statistical Analysis
Sources of Error
Conclusions
Possibilities for Future Research